Showing posts with label How-to. Show all posts

January 04, 2010

Recipe Day

I figured it was time to share another recipe with you today. This is a recipe that I got from my friend Tammy that I used to work with at Clarke American. She brought some in one day and they looked yummy, so I got the recipe from her and guess what!! They are really yummy! At least I think so. Chris doesn't enjoy them so much, but he suffers through them every once in a while.

Sour Cream Enchiladas

Sauce:
1/4 c. butter
1/4 c. flour
2 c. chicken broth
1 c. sour cream
8 oz diced green chilies

You'll also need:
Flour tortillas
Monterey Jack cheese, grated
Yellow onion, chopped

Make the sauce: Melt the butter in a pan, add the flour to make a rue. Cook for a minute or 2. Add broth, use whisk to blend into rue. When evened out add sour cream and chilies. Let sit on low to thicken.
To make enchiladas: Wrap cheese and diced onion in tortilla, filling as much as you like and place in 9 x 13 inch baking dish. Pour sauce over enchiladas. Add more cheese on top. Bake for 20 minutes at 425 degrees.

Some alterations to the recipe that you can try: I use whatever cheese, ususally cheddar, and onion that I have on hand. I also always make mine with shredded chicken ( I actually haven't ever made them without). I did also try them with shredded turkey the other day since I've had so much around here, not as good as with chicken, but still pretty good.

October 17, 2009

What's for dinner...

So I thought some time ago that it might be fun to start sharing some of my recipes with you all (okay, the one or two that read this), but hadn't taken the time before now. I figure since I've not done much blogging lately due to nothing much exciting going on around here, this would be the perfect opportunity. Of course I say this now and it's the start of the holiday season, so I am sure I will start posting more... but in the mean time I'm going to go ahead and share a recipe or two with you here and there.

I love really easy recipes and I have a bunch that I've grown up with, some I've "borrowed" from friends, and also ones that I've pulled off the internet. I do enjoy cooking, but I don't do so well with being creative enough to come up with my own stuff. So the recipes I will be sharing will not be my own, but ones that I do love and enjoy making. They are simple recipes, most with not many ingredients and are just easy to make. I think that's why I like them most.

When I started cooking on my own and trying out recipes from growing up, I can't tell you how excited I was  when something that I cooked tasted like my moms. It still bring a smile to my face, even after all this time,  when I make something that tastes just like when mom used to make it. The first recipe that I'm going to share with you tonight is one of those recipes.


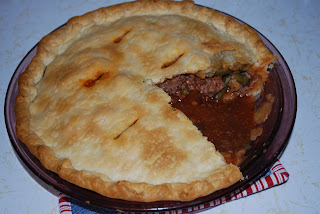
Hamburger Pot Pie

1 lb hamburger
1/4 - 1/2 c. chopped onion
1 can (pint) green beans, drained
1 can (10 oz) tomato soup
1/4 tsp. black pepper
1/8  tsp oregano
salt to taste
Pie Crust

To start...if you plan on making your own pie crust, I would make this now and get it ready, or you can make it while browning the hamburger. I have made my own crust before, but usually buy it. I haven't quite mastered pastry making.

Brown hamburger and onion together. Stir in green beans, tomato sauce and seasonings. Pour into pastry filled pie plate. Add top crust and cut slits.

Bake at 400 degrees for 25 minutes.

And that's it. It's really that easy, and such a good meal. If you have a larger family or want to share with friends this can be made in a 9 x 13 in pan. If you do this, you will need to make your own pie crust and would just double the recipe. (This is how mom did it growing up.) Or you could just do 2 regular pies.

It's a good idea to let it cool for 5 minutes or so for the sauce to thicken up.I got a little anxious and as you can see it's a little runny.

And it didn't come out very well either, but it sure did taste good. Hope you enjoy it if you try it!

October 08, 2009

How'd you do that??

I've had a few people that wanted the info on how I made my scripture totes. I did take inspiration from others but did my own thing when I put mine together. I'm really not clever enough to think of something like that on my own, but am really good at copying :) I also do not promise for any of this to make sense, but if you need clarification on something...I'll try :)

How I did mine....

This is what you'll need...
*1 placemat ( I got some at the dollar store, Target and Walmart. They can be found for $2 or less)
*3 feet of ribbon for the handles (I used 1 inch wide)
*a little over 2 feet of ribbon for the accent stripe (I used a little wider ribbon, up to 1 1/2 inches) on the red  one
*1 silk flower
*safety pin
*thread

To put together...
1. Cut the ribbons for the handle 18 inches long
2. On each end of your placemat measure 3 1/2 inches in from the side and 2 1/2 inches in from the top and pin on your ribbon to create a hangle on each end of the placemat.
3. Sew on handles. I started on the cut end sewed to the and went around so that my thread ends would end up under my accent ribbon.
4. Cut accent ribbon to width of placemat, this will cover the cut ends of the handles
5. Measure down 2 inches from end of placemat (same side as your handles are on) and pin on your accent ribbon.(On the red version I didn't have any wide ribbon so I used one that was a little narrower then the handle ribbon and then a checkered ribbon that I had.)
6. Sew down both sides of ribbon.
7. Fold placemat in half with the handles on the inside. Match up sides and sew down them. I sewed in about a 1/2 inch so I didn't have to compete with the seams of the placemat.
8. (This is where it get's tricky and may not make sense) To make the corners squared, push the seam open and pin. Measure up 2 inches and draw a line. Sew on the line you drew. You can now cut out the excess leaving a 1/2 in allowance  or leave it there. (I'll take a picture and post it once I make another one since I've already turned in the samples I made).
9. Turn right side out. Put your scriptures or other books, items etc you want to carry in your cute bag and enjoy.

I really hope this makes sense.

Here are the websites I checked out when I was getting ideas...
Tote I, Tote II, Tote III in case you want to check them out.

Ta Ta for now!